Anúncios
This concise guide helps artists choose the right tools for professional graphite and charcoal work.
Rebecca Schweiger, founder of The Art Studio NY, brings over 22 years of professional experience to this topic. Her insight makes it easier to see how tool choice affects final tone and texture.
We explore key differences between classic tools like blending sticks and simple options such as tissue. The goal is to help you refine technique and get consistent results.
Practical tips focus on material properties, control, and cleanup. You will learn when to use specialized tools and when a quick, manual method gives the same effect.
Expect clear, actionable advice that you can apply in your next drawing session, whether you work from life or photographs.
Anúncios
Understanding the Role of Blending in Pencil Drawings
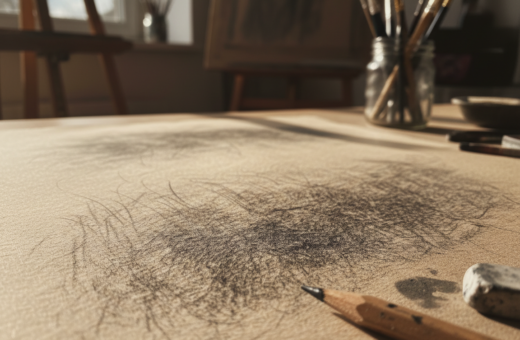
Smooth transitions are what separate a sketch from a finished portrait. Achieving consistent, soft gradients helps the eye travel across form and read subtle changes in light and tone.
Rebecca Schweiger stresses that proper blending tools are vital for a realistic finish. When you use blending tools well, you control value, texture, and the illusion of depth.
The Importance of Smooth Gadients
Create smooth areas by easing pressure and using controlled strokes. A well-handled stump or rolled paper moves graphite and charcoal into delicate tones without losing detail.
Anúncios
- Use lighter pressure to avoid muddy midtones.
- Work in small, circular motions to produce even transitions.
- Swap tools for fine details to keep edges crisp.
When Blending Becomes Necessary
Many artists blend only when paper texture cannot give the needed soft gradients. For example, a portrait artist might use a stump to soften hard lines and render realistic skin.
Mastering these techniques lets you manage tone and value so every stroke serves the final drawing.
Comparing Blending Stumps vs Tissue Shading
Choosing between a firm paper tool and soft tissue changes how graphite and charcoal settle on paper. The decision affects edge control, texture, and how smoothly midtones flow in a drawing.
Blending stumps are made from tightly rolled paper. That construction helps the stump hold and transfer material evenly. A blending stump gives more precision for small areas and complex textures than a sheet of tissue.
Tissue works well for broad, gentle softening in charcoal drawings. It creates soft transitions quickly but can lose control on fine details.
- Control: stumps give accurate strokes for tight highlights and edges.
- Durability: a stump keeps its shape longer than a folded sheet.
- Versatility: tissue suits large atmospheric shifts while a blending stump refines.
Try both tools on the paper you use most. Practicing will show when to use blending tools to reach the look you want in pencil drawings.
Factors Influencing Your Choice of Blending Tools
Paper surface and subject matter shape how you approach soft transitions. Make a quick check of both before you pick a tool.
Considering Paper Texture
The texture of your paper plays an important role in deciding whether to use blending tools or rely on pencil pressure alone. Stonehenge paper is 100% cotton and gives a smooth finish that often removes the need for aggressive tools.
In that case, subtle graphite layers and light pressure can create smooth gradients. Coarse charcoal paper, however, may show a laid pattern that suggests foliage or rough surfaces without extra work.
Evaluating Subject Matter
What you are drawing dictates the tool choice. Fine skin tones or close facial details often call for a stump or a dedicated blending stump to keep edges crisp.
Meanwhile, distant trees, rough rocks, or expressive marks can be built with pencil strokes alone. Artists should consider textures, light, and the level of realism required to avoid overworking a piece.
- Paper: smooth cotton needs less tool use.
- Subject: portraits may need precise control; landscapes may not.
- Technique: use blending sparingly to keep drawings clean.
Mastering the Technique of Circling for Smooth Transitions
The circling technique uses the side of the pencil tip to lay down soft, overlapping circles. This lets artists create smooth planes of tone while keeping fine detail intact.
Start with light pressure and short, even rotations. Work in small areas and build tone gradually to avoid a muddy look common with heavy charcoal or too much blending.
Many artists rely on a blending stump for tight areas, but circling gives similar control without that tool. Using this method on smooth paper helps you achieve smooth transitions and preserve texture where you want it.
- Use the pencil side to spread graphite for even value.
- Vary pressure to layer tones and define form.
- Keep circles small near edges to retain sharpness.
Practice the motion and you will reduce dependency on a stump for every area. For more context on circling and how to use blending tools together, see circling and blending methods.
How to Use Blending Stumps for Professional Results
Mastering a paper tool gives you control that lifts a sketch toward professional polish. Start each area with clean graphite placement, then refine with careful smudging to keep values clear.
Applying Graphite with Precision
Lay down tone with light, even strokes. Use the pencil to define edges and small details before you use a blending stump to soften them.
The Virtual Instructor notes that precise graphite application forms the base for realistic results and higher contrast where needed.
Creating Soft Edges
Hold the stump at an angle so the side covers more area and you can create smooth transitions. Push the tip slightly to dull it, then drag gently to form soft edges.
“For an eye, use the tip to smudge the iris so it reads natural, not mechanical.”
Managing Pressure
Start with light pressure and build value gradually. Alternate between pencil and stump to refine tones without losing texture.
Dirty stumps can be useful too — they transfer faint marks for wispy clouds or soft shadows in charcoal or graphite charcoal work.
- Tip: hold blending stump at an angle to cover more paper.
- Tip: begin light, then increase pressure slowly to avoid muddy tones.
- Example: switch tools often to preserve fine details and sharp highlights.
For more on combining strokes and tool use, see layering pencil strokes for improved control and transitions.
Essential Maintenance for Your Blending Tools
Good tool care keeps your marks pure and your paper clean. Regular maintenance prevents color contamination and keeps your drawings crisp.
Wipe a blending stump on scrap paper every few minutes while you work. This removes excess graphite and charcoal and stops unwanted smudges.
- Clean the tip by rubbing it on fine-grit sandpaper until the original rolled paper surface appears.
- If the tip frays, trim it back with a craft knife or nail clipper to form a sharp point.
- Store stumps in a dry box to protect paper fibers and avoid transfer between projects.
Maintaining tools extends their life so one blending stump can serve many drawings. Artists who care for equipment find their tonal transitions and textures stay consistent.
Tip: alternate pencil and stump work and check the tool often. Using clean tools reduces the pressure needed to achieve smooth tones and helps preserve delicate highlights.
Advanced Blending Techniques for Realistic Textures
Building texture through repeated, light passes creates depth without losing surface detail. Layering lets you control midtones and sharp highlights while keeping paper tooth intact.
Professional portrait artists use charcoal and graphite in thin layers to match subtle skin shifts. Start with a base tone using light pencil or charcoal and add successive, narrower passes to define form.
Layering for Intricate Details
Combine different sizes of stump and tortillon to get both broad transitions and fine details. Use a larger stump for soft value shifts, then switch to a fine tip for edges and pores.
- Tip: establish base tones on paper with light pressure, then refine with a small stump to pull midtones smooth.
- Example: pet portraits gain volume when charcoal follows fur direction and a stump softens overlaps.
- Result: careful layering produces realistic textures for skin, hair, and fabric without overworking the drawing.
Adapting Blending Methods for Different Art Mediums
Each medium reacts to pressure and tooth in its own way, so simple tweaks deliver better transitions and depth.
Paper texture plays an important role when you work with charcoal, pastel, or colored pencil. Soft charcoal needs more gentle movement to keep value smooth. Cotton or smooth surfaces often require less smudging to create soft tones.
DIY tools are handy. Cut a standard sheet into 1-inch strips, roll tightly, and secure with tape to make two custom tools. A small roll gives detail; a thicker one covers broader areas.
Hold the tool at a comfortable angle so you can use both broad strokes and fine marks. Artists who learn to hold blending stump variants find they control pressure and texture more easily.
- Tip: use blending tools gently on colored pencil to create smooth color transitions.
- Tip: adapt strokes and pressure when moving between graphite and charcoal.
- Tip: make multiple DIY sizes to match the details you need.
Conclusion
Knowing when to rely on tools or let your pencil lead the way saves time and protects paper textures. Use blending stumps and folded tools with light, steady pressure to refine tone in graphite and charcoal work.
Good care matters. Keep tools clean and test marks on scrap paper to prevent unwanted smudges. This simple habit helps you achieve professional results across most drawings.
Practice core techniques like circling and controlled passes. Try different methods, note how paper and subject respond, and you will build a confident rhythm for each piece.
With consistent work, you will know when to use a blending stump and when to let pencil strokes define form. That choice is what moves a study toward a finished, convincing image.